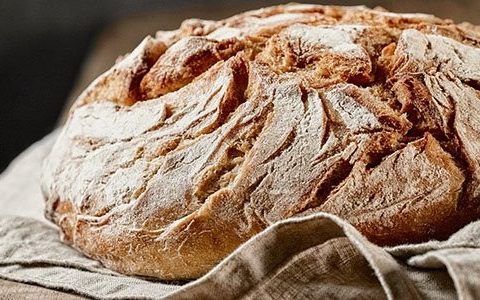
8 Tips for Baking Better Bread at Home
It’s common to hear “I’m afraid—I can’t make bread,” sometimes from people who have never even tried. But with modern bread machines, mixing bowls, and powerful mixers, homemade bread should be on every home cook’s weekly list. From the four basic ingredients—flour, water, salt, and yeast—most of us probably have at least three on hand right now. With a little understanding of how these ingredients work and a few key techniques, you can bake with confidence and truly enjoy the process.
1. Invest in a Kitchen Scale
Good bread dough depends on the right ratio between flour and water. You’ll get more consistent results if your measurements are accurate. If your recipe lists ingredients in cups, convert them by weighing the flour multiple times and calculating the average. Then use grams moving forward for more reliable baking.
2. Test Your Yeast
Fresh yeast doesn’t always need testing, especially if you bake frequently. But if your yeast has been sitting in the fridge for months or forgotten in the pantry, it’s safer to check it first. Warm some water (just warm to the touch), add the yeast and a bit of sugar or honey, then wait 10–15 minutes. If it foams and becomes bubbly, it’s active. No bubbles? The yeast is dead—get a fresh pack.
3. Limit Excess Flour in the Dough
Many bread recipes give vague flour measurements like “7–8 cups.” This lack of precision often leads to dense, heavy loaves. Use the ratio 2:1 (flour to water) for sandwich bread as a reliable guide. Even if your dough feels sticky, trust the ratio. Avoid the temptation to keep adding flour—it will only ruin the texture.
4. Don’t Use Flour When Kneading
Flouring the kneading surface may seem helpful, but it adds unwanted extra flour. Instead, lightly oil your hands and work surface with olive oil or melted butter. This prevents sticking without changing the dough’s texture. A small amount of added fat can even help keep bread soft longer after baking. Use a bench scraper to clean any stuck dough.
5. Test Gluten Development (Elasticity)
Kneading develops gluten, the stretchy protein that gives bread structure. After about 5 minutes of kneading, pinch off a small piece of dough and gently stretch it into a thin sheet. If you can stretch it thin enough to see light through without tearing, the gluten is developed. If it tears early, keep kneading.
This test works best with white flour. Whole grain doughs don’t stretch as well because of bran and fiber, so they naturally rise less and are harder to test for transparency.
6. Fast Warm Rise or Slow Cold Rise?
Dough rises faster in warmth, but slower fermentation (especially in the fridge) improves flavor. Most recipes call for two rises: the first in a bowl and the second after shaping. Try letting your shaped dough rest overnight in the fridge. The next day, bring it to room temp and let it rise again before baking. Refrigerating the dough at any stage is better than letting it overproof on a warm counter.
7. Score, Glaze, Decorate
Scoring dough isn’t just decorative—it helps control how the bread expands in the oven. Without it, you might end up with large air pockets under the crust. For sandwich loaves, cut one long line down the center. Round loaves benefit from a cross-cut, and baguettes look best with several angled slashes along the top. You can also glaze with egg, water, or milk before scoring and top with seeds like sesame or poppy.
8. Keep Bread Fresh in the Freezer
If you won’t eat the entire loaf right away, let it cool completely and freeze it. For sandwich bread, slice it before freezing. That way, you can just take out what you need. Frozen bread can be toasted directly, or left to thaw and stay soft. When frozen properly, homemade bread keeps its freshness and flavor for up to three weeks.
Make sure the bread is fully cooled before storing. Seal slices or whole loaves in airtight freezer bags with as much air removed as possible.


